
Goal: This guide will walk you through how to upgrade a Windows 10 Home computer to Windows 11 Pro using an in-place upgrade. This does NOT require you to reinstall the operating system but you will need to reboot your computer. Make sure to save and close anything you have open.
NOTE: There is a chance that this upgrade will fail and throw errors. In the event of that you will need to see the additional steps at the bottom of this artile.
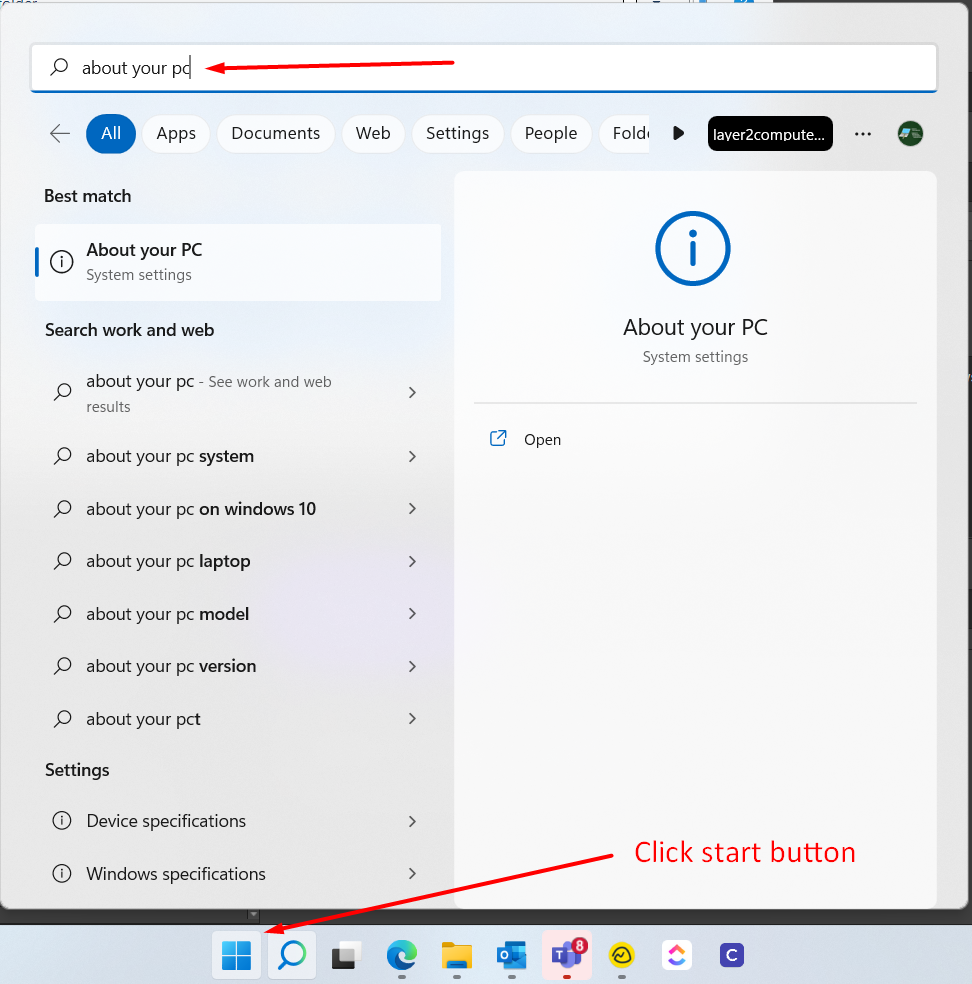
- Go to start and type in about your PC
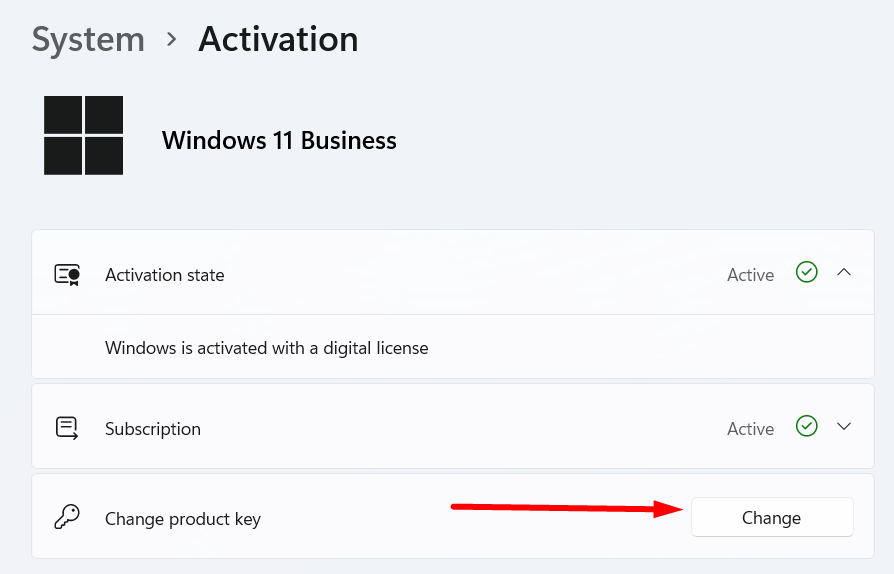
- Scroll down and click on Product Key and Activation

- Click the Change button next to Change product key
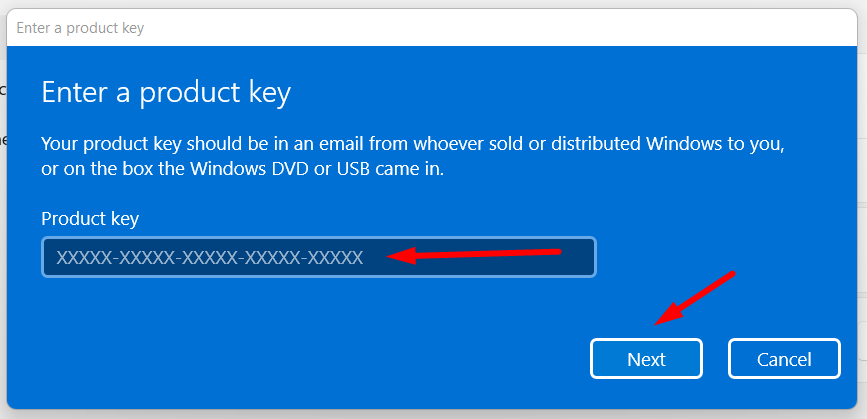
- Type in the product key you were provided and click Next. Follow any prompts that come up, you will be required to reboot your computer.
Additional Steps:
Note: You will only do these if the above steps do not work.
- Take your computer off of the internet by disabling your Wifi or unplugging your ethernet cable. Just make sure your computer is offline.
- Use this temp key provided by Microsoft to perform the upgrade: VK7JG-NPHTM-C97JM-9MPGT-3V66T
- Once that goes through you then need to reboot. You will see an error saying your copy of Windows is not activated.
- Turn on your Wifi or plug in your ethernet cable to get back on the internet.
- Use the proper NEW key provided and it will activate your now Windows 11 Professional install.


